
Updated November 1st, 2022.
Some documents, especially images, can potentially be opened by several apps on a Mac. For example, on my Mac the following apps can open a JPEG:
- Preview
- Affinity Designer
- Affinity Photo
- Affinity Publisher
- Adobe Photoshop
- Acorn
- Pixelmator
- Pixelmator Pro
… and several more.
Method 1: Control-click
How did I know which apps could open a JPEG on my Mac? I used the Control-click method, that’s how. You can do this too: just hold the Control key down and click (once) on the icon you’re interested in. For example:
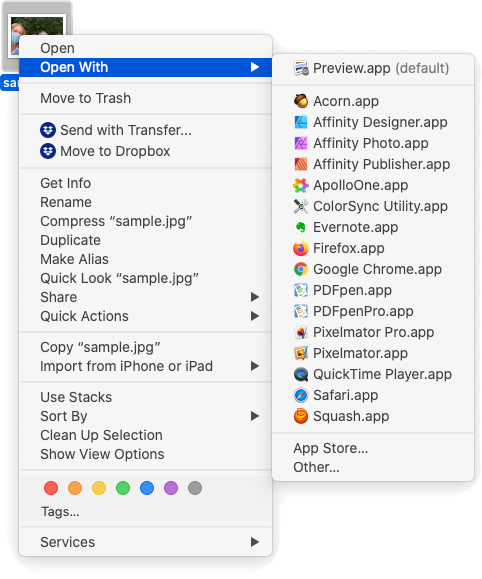
Just slide over to the app you want to open the file with, and voilá. It opens.
(Your “Open With…” menu will probably look different than mine, because you probably have a different set of apps on your Mac.)
Method 2: Get Info
You know that double-clicking a file will open it up, so how does the Mac know which app you want to use? Well, the menu you get when you Control-click gives a hint: the app at the top of the list has “(default)” after it, and that means it’s the app that will open unless you say otherwise. But let’s say you want to open this file with something other than the default app, every time. How do we tell the Mac that we always want to use a certain app for a certain file?
This is really easy, and we can do it for one file, or for all files of the same type. It all starts with Get Info (⌘-I): click once on the icon to select it, and then either choose Get Info from the File menu, or ⌘-I. Either way, you’ll bring up the Get Info box.

If the “Open with:” section isn’t showing, click the disclosure triangle to the left of the name to flop it open. Here you can change the app that will be used to open this particular file. In this example, I want to always open this particular file with Pixelmator Pro, so I’ll click on the little menu in the Get Info box and choose it from the list. The result is shown below.
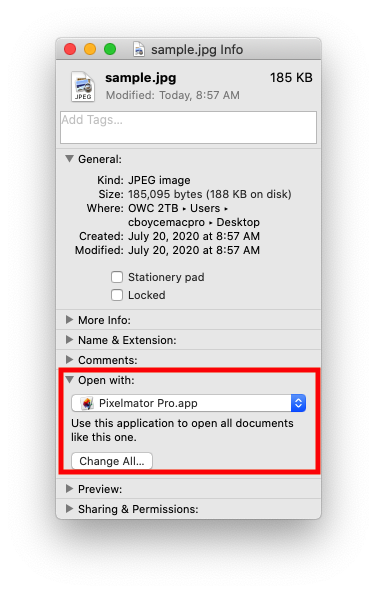
At this point, what we’ve done is tell the Mac to always open this particular file with Pixelmator Pro, but we have not changed the default app for other JPEGs. For them, the default is still Preview. But if we click the “Change All…” button we can set the default app for all JPEGs to Pixelmator Pro, all in one swoop, without going to Get Info for each file individually.
When you click the “Change All…” button you get a warning:

If you’re sure, click “Continue,” and that’s that. Of course you can easily change your mind and change the default app for JPEGs by simply getting info again, changing to a different app, and clicking “Change All…” again.
When you do a “Change All…” the Get Info box changes to indicate that the app you’ve chosen is now the default app for opening files of that kind.
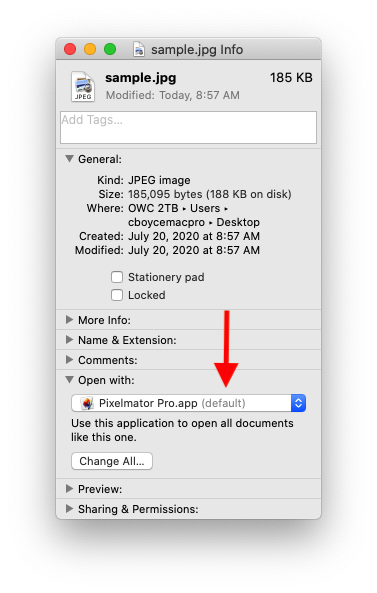
Setting the default app to one that you really like to use can save you a bunch of time, so definitely look into this.
Adobe Acrobat likes to take over opening PDFs, and the way they do it is they pester you with messages asking whether you’d like to make Acrobat Reader the default app for PDFs until one day you accidentally click “Yes.” Use this “Get Info” method to change the default app for PDFs back to Preview. Read my article about Acrobat and Preview for more information.
Method 3: Drag to app icon
This is one of my favorite methods as it gives you great flexibility. All you have to do is drag the icon you’re trying to open onto the icon for the app you want to use. The icon can be in the Dock:

Or it can be in the Finder:
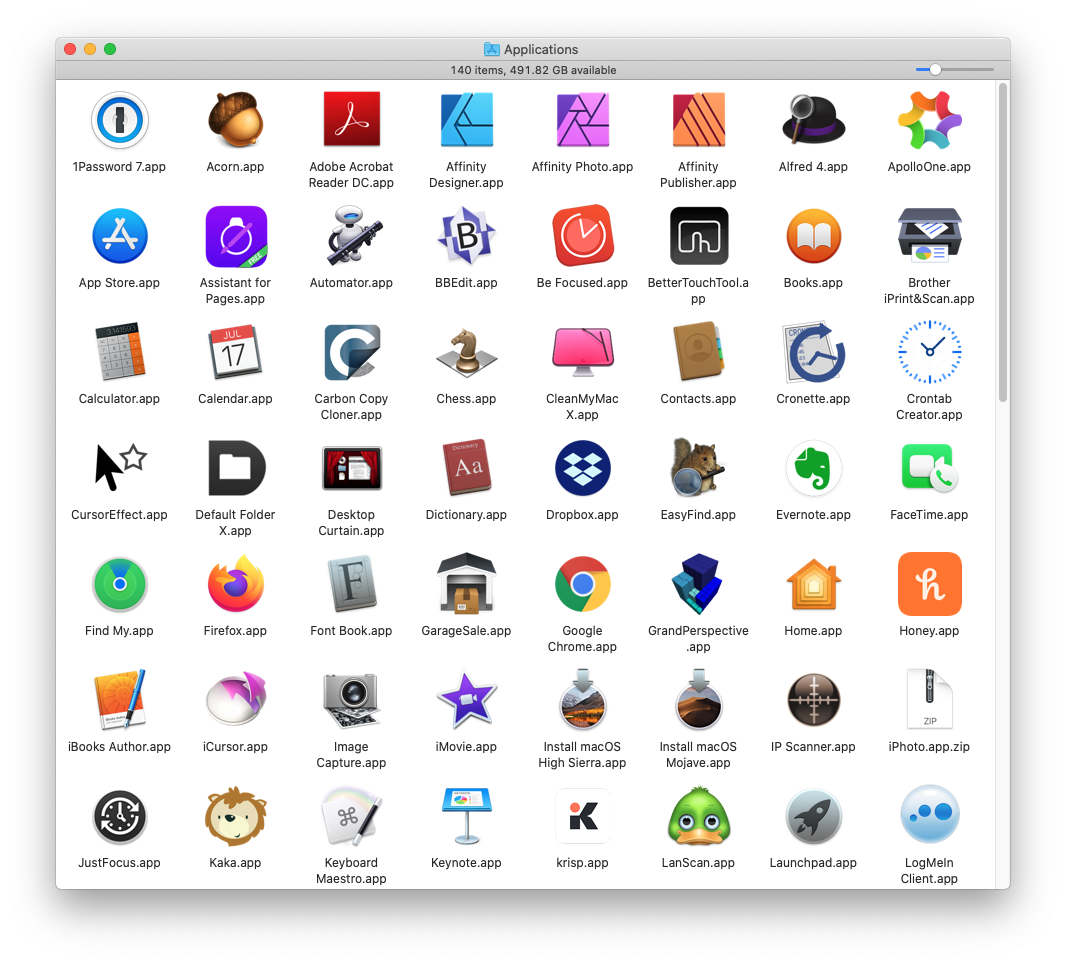
Or it can be an alias on your desktop (make sure it’s an alias, indicated by the little curvy arrow at bottom left, and not the real app):

Real apps belong in the Applications folder, not just for neatness but because updaters expect to find apps there. If you drag your apps to the desktop they might not ever get updated again.
Making an alias is easy: click once on the app’s icon, then go to the File menu and choose “Make Alias.”
Dragging a file to an app icon in the Dock, or to an app icon in the Applications folder, or to an app alias icon on the Desktop are all great ways to make a file open in the app of your choice. Better than all of those, for me, is to drag the file to an app icon across the top of the Finder window that the file is in. For example:
I could drag my sample.jpg file onto Affinity Designer, Affinity Photo, Squash, Mail, or Preview and something would happen.
Exactly what happens depends on the icon I drag my file to. See below:
- Affinity Designer: the file is opened in Affinity Designer
- Affinity Photo: the file is opened in Affinity Photo
- Squash: a copy of the file is made and compressed for use on the web
- Mail: a new Mail message is created, with a copy of the file as an attachment
- Preview: the file is opened in Preview
How do we know that something will happen when we drag our file over an app’s icon? Same way that we know when we drag a file over an icon in the Dock, or over an icon in the Applications folder, or over an app’s alias icon: the icon highlights (technically, it darkens). If the app can’t handle the dragged file you get a circle and a slash, as I would if I dragged my sample.jpg file to the Calculator icon. (I keep the Calculator in the Finder toolbar for easy, one-click access without going to the Dock.)
Wondering how to add app icons to your Finder windows? Very easy: use the Command-drag method. The Finder toolbar can serve as a mini Dock, and it’s super handy because the icons are at the top of every Finder window. So the apps you care most about are always close at hand– you don’t have to go all the way to the Dock to click them.
Method 4: Drag to app window
Some apps let you insert a file right into a document window simply by dragging it in. That’s about as much control as you can get– you know for sure exactly what app will handle the job because you’re literally adding the file to an existing document. And you probably will know right where it will end up, because you can drag it to where you want it within the document.
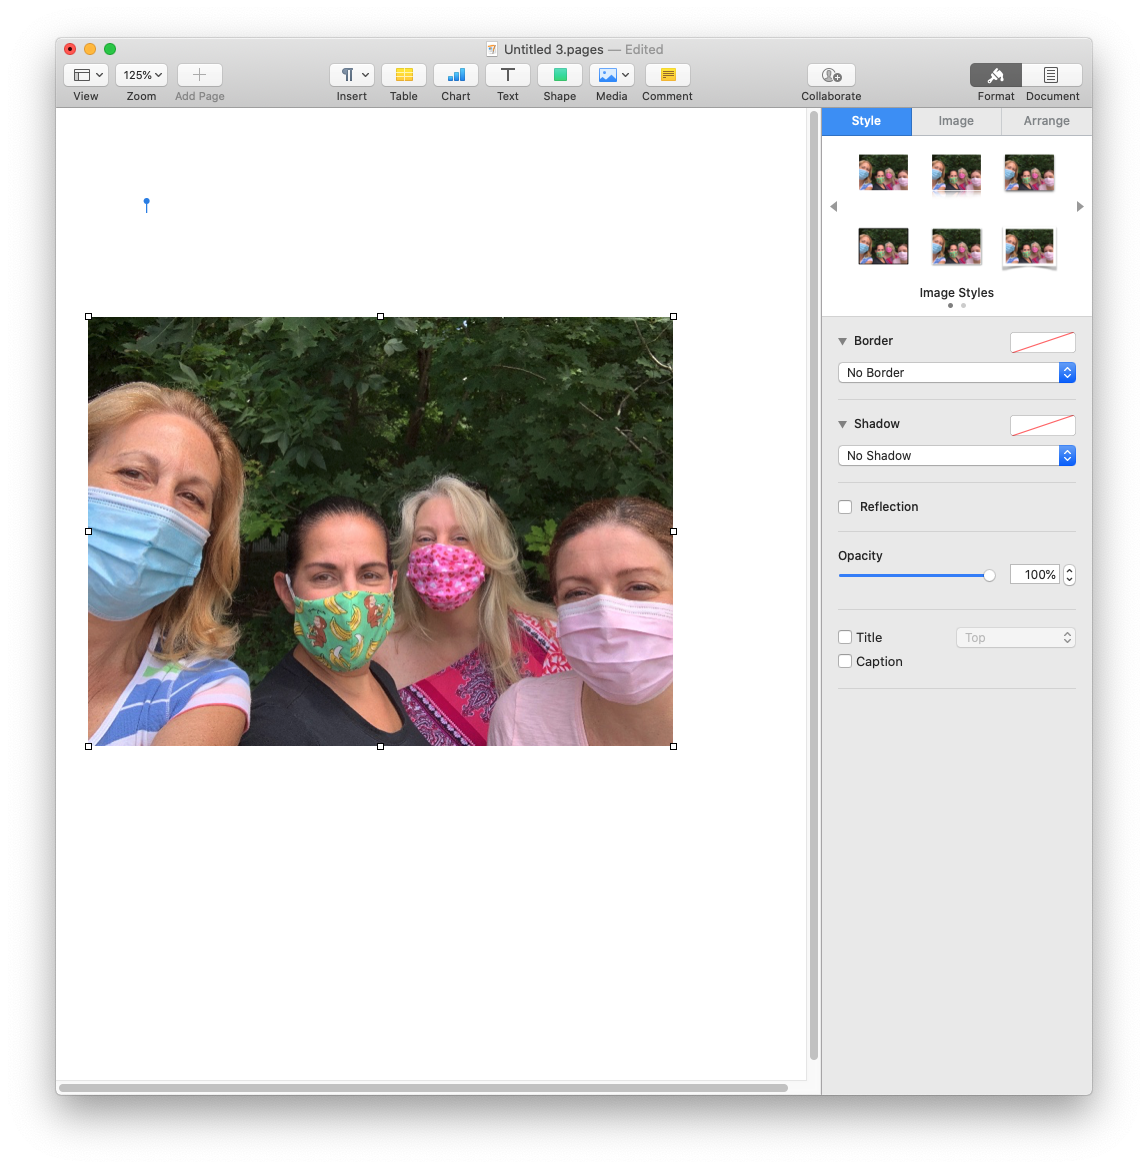
For example, if you have a document open in Pages you can drag a file right into it.
Here I’ve dragged the same file into an open Pixelmator Pro document:
Experiment with this– you may find it’s just what you need.
In conclusion…
Armed with the knowledge gained herein you’ll be more more in control of what happens when you open a file whether you’re double-clicking it, dragging it, or inserting it.
Know another way to do it? Let me know, right here in the comments.
Copyright 2008-2024 Christian Boyce. All rights reserved.Did this article help you?
Maybe you'd like to contribute to theChristian Boyce coffee fund.

Want some some quick iPhone how-tos?
Visit me at iPhoneinaminute.com.
Looking for quick tips about Macs?
See my One-Minute Macman website!

Please Leave a Comment