Updated June 14th, 2019.
Got something to say? Want to show off your pictures? Want to document your vacation, or the 4th grade, or comment on your favorite sports team’s season? You need a blog.
Here’s how you make a free blog using WordPress. All you need is a web browser and an internet connection. WordPress is a very popular platform for blogging, and it’s free, and you can learn how in a hurry by reading this article.
(The screenshots here are from a Mac using Google Chrome, but you can use Safari or Firefox or any other modern browser. iPhone and iPad user can download the WordPress app and work from there. The WordPress app is also great for adding blog posts “on the go.”)
Step 1. Go to WordPress.com.
WordPress.com will host your website for free. You get more features if you pay, and you may even want to move to another host, but for learning purposes WordPress.com is a great way to go. (If you move to another host you won’t lose anything– you can export and import to another
Step 2. Click Get Started.
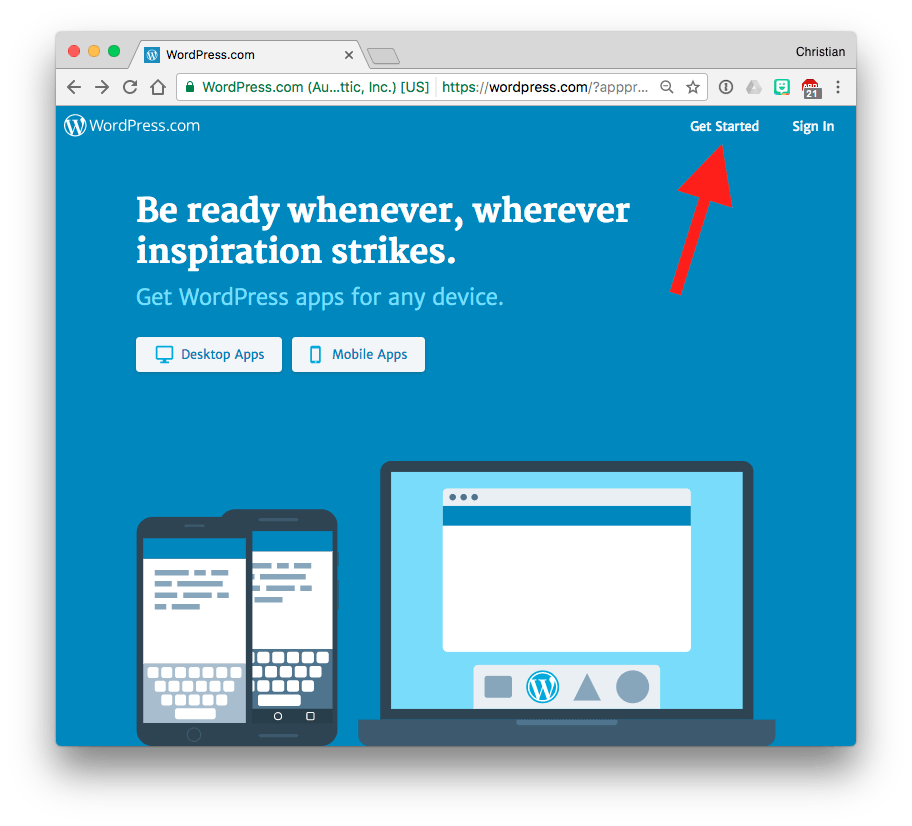
But first, scroll all the way down WordPress.com‘s home page. WordPress.com‘s home page is long, and it really tells the story. Read that page and you are on your way! Note that WordPress.com‘s interface changes from time to time, so if you don’t see “Get Started” look for something similar.
Step 3. Choose a website type.
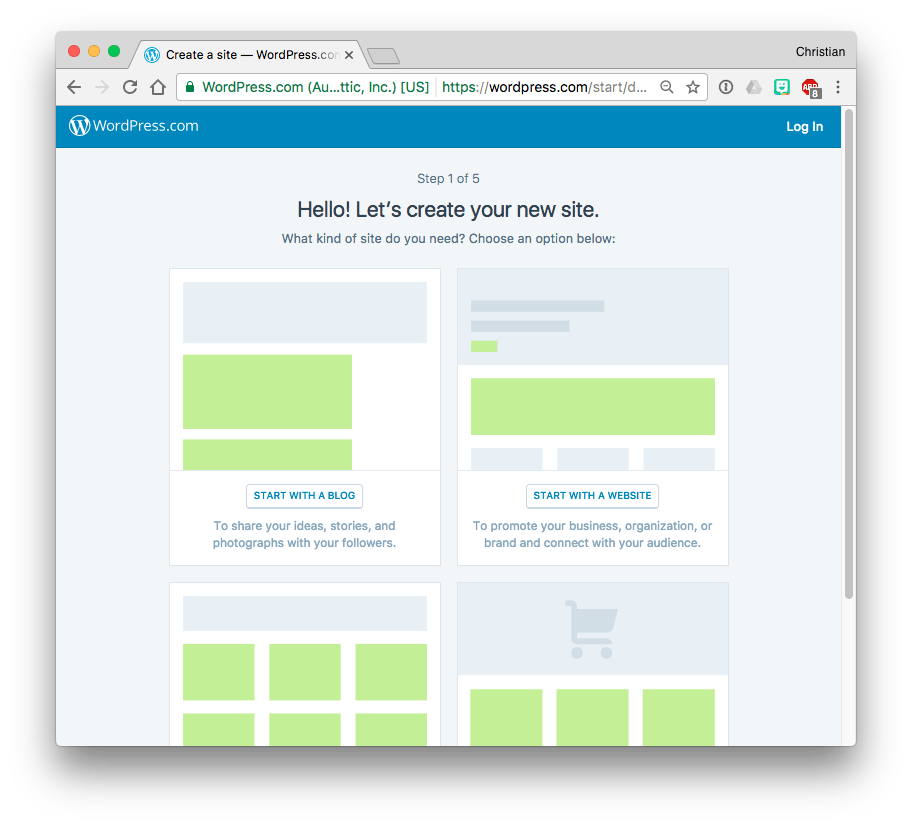
Choose from Blog, Website, Portfolio, and Store. You can change this later. The first three are free; you’ll have to pay to have a store. Choose one of the free ones.
Step 4. Choose a Theme.
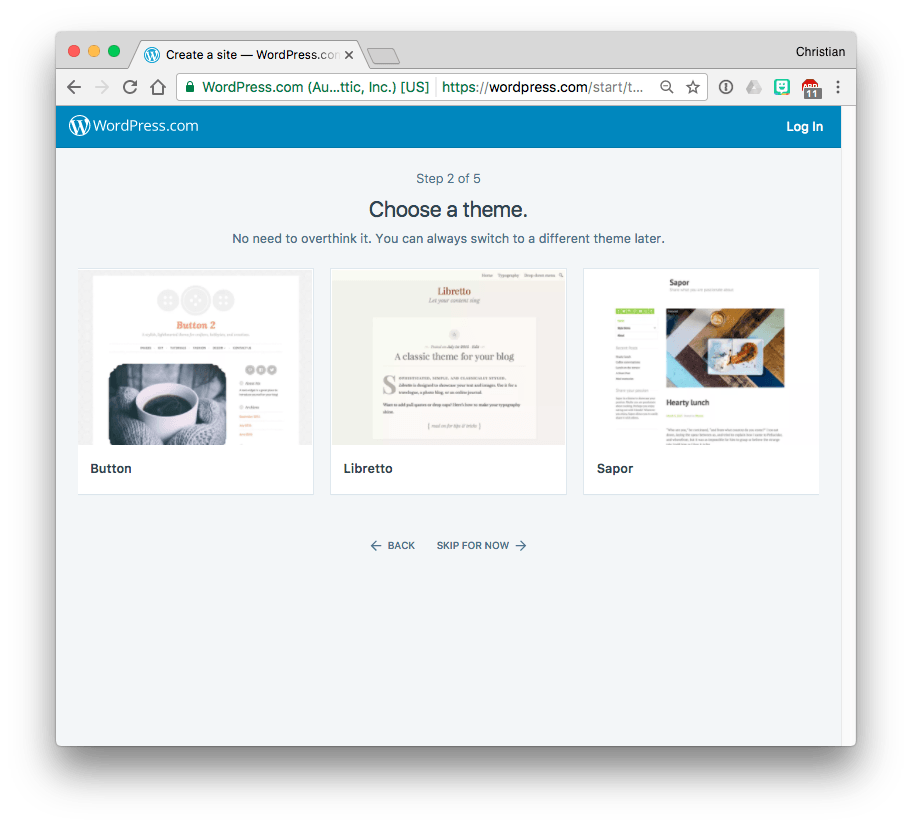
The theme controls the overall look of your website. It takes care of everything for you– the layout, the fonts, everything. This means you don’t have to worry about being a designer or formatting or anything like that. You can choose a different theme at any time to give your site a different look.
Step 5. Name your site.
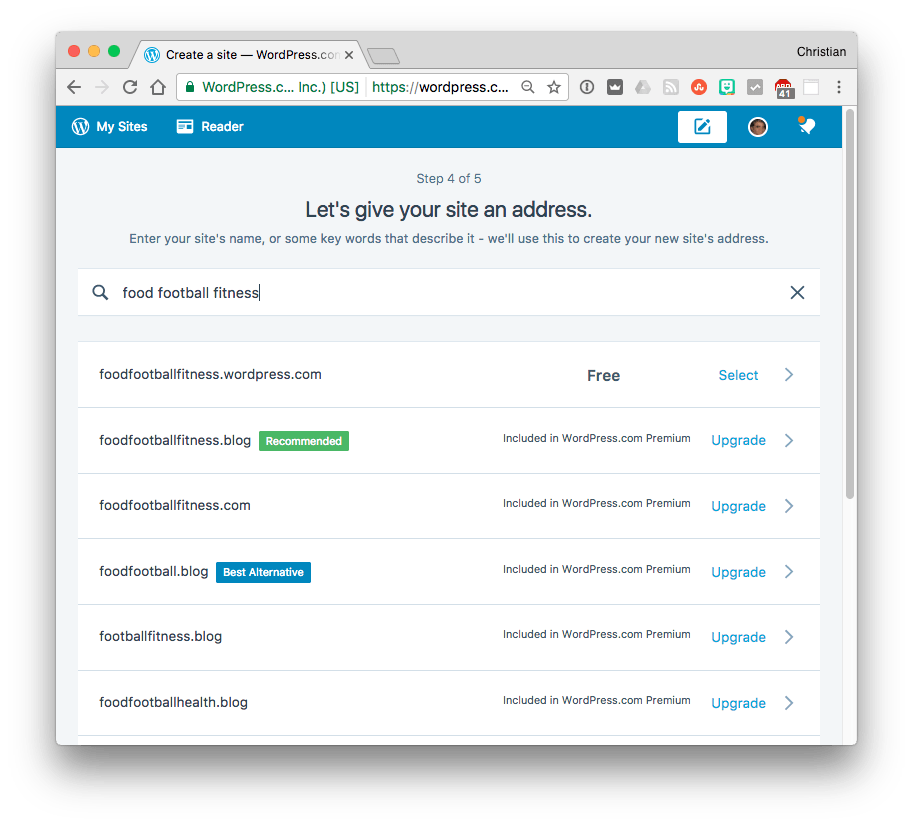
This is important. The name you choose here will be your site’s URL, so pick something good. Since we’re going with the free options our website’s URL will end with “.wordpress.com.” That’s the price you pay for getting something for free. Upgraded accounts can have custom domains– that is, they don’t have to end with “.wordpress.com.” Let’s keep going with the free option for now.
Step 6. Pick a plan.
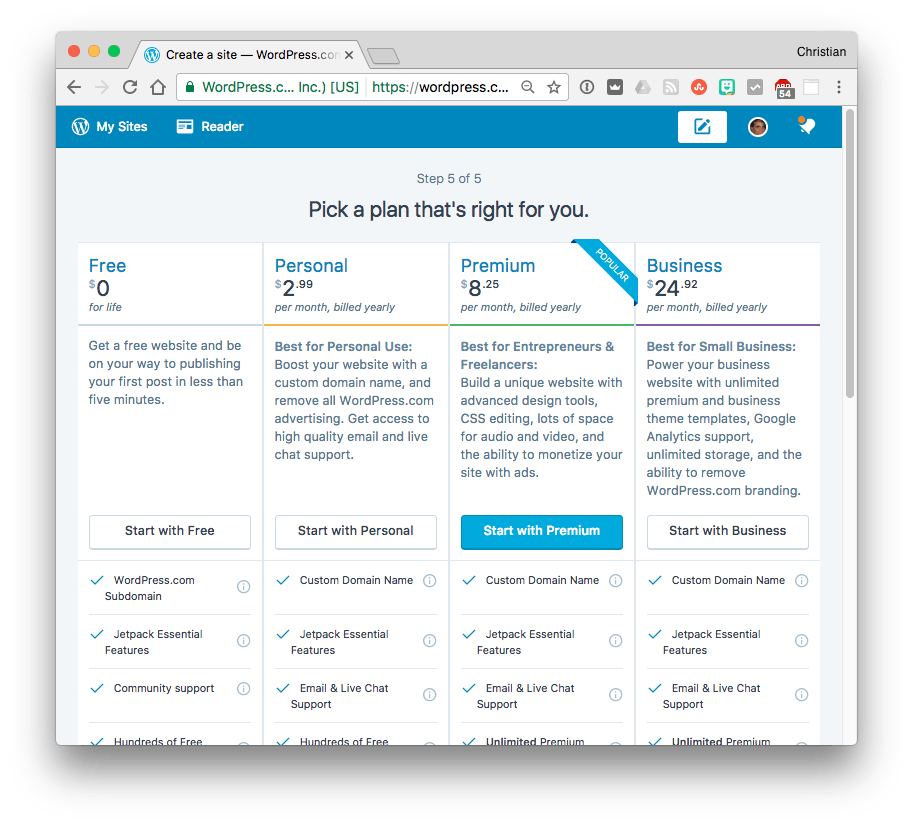
Let’s start with free. You can add services later if you want to, or take your site to another host. For now, “Free” will be fine.
Step 7. Create an account.
This is easy. Enter your email address and a password. The username will be suggested for you but you can change that. If you already have an account WordPress.com will notice that you’re trying to create a new account using the same email address, and they’ll just ask you to sign in.
Step 8. Click Continue.
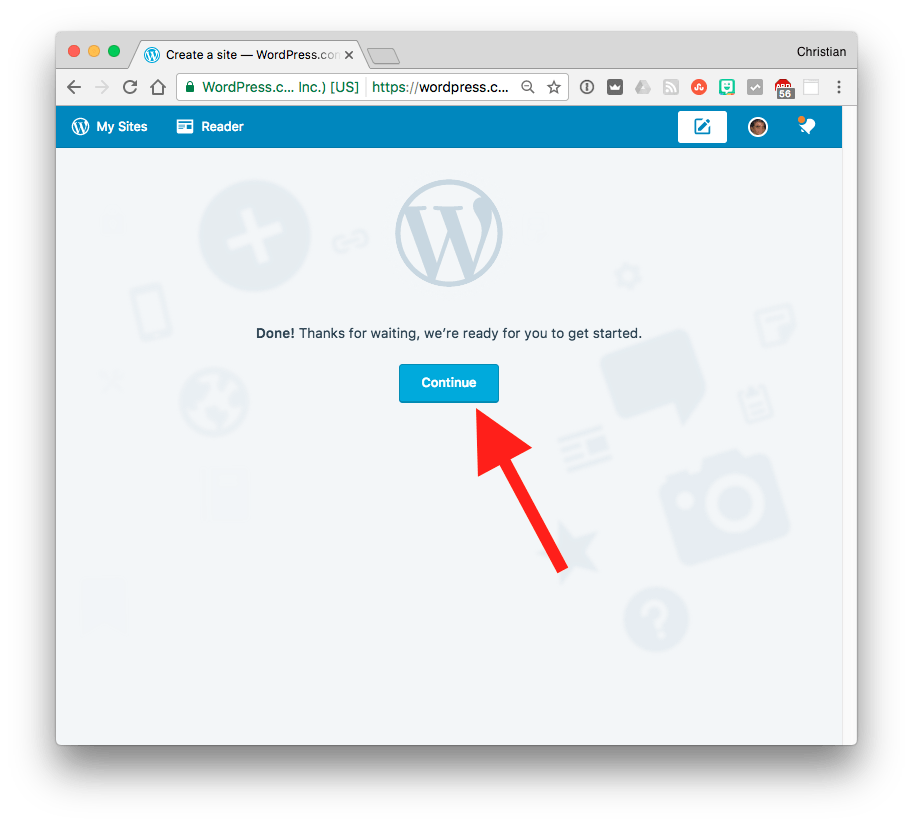
Last step! Your blog awaits! Just click the Continue button.
Next (Part 2): creating and editing WordPress blog posts. Adding images. Adding categories.
Did this article help you?
Maybe you'd like to contribute to theChristian Boyce coffee fund.

Want some some quick iPhone how-tos?
Visit me at iPhoneinaminute.com.
Looking for quick tips about Macs?
See my One-Minute Macman website!

Please Leave a Comment