Updated December 3rd, 2015.
Ten tips in ten days. It’s the iMom Project, Day Nine.
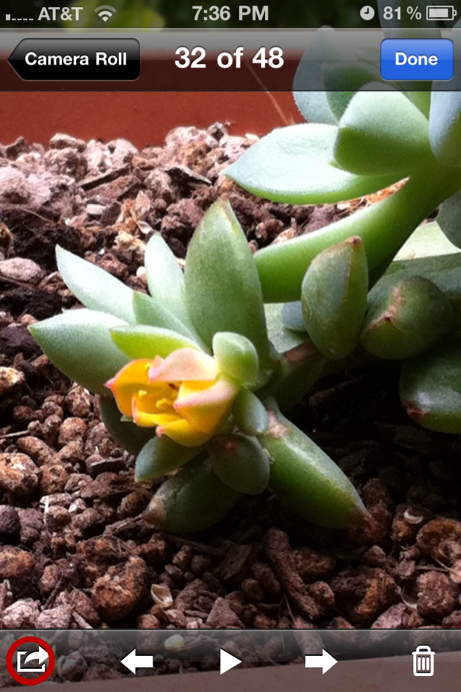
You already know how to take a picture and email it: take the photo, get to the Camera Roll in the Photos app, and then touch the little curvy arrow flying out of a rectangle. I circled in red the little curvy arrow flying out of the rectangle in the picture below.

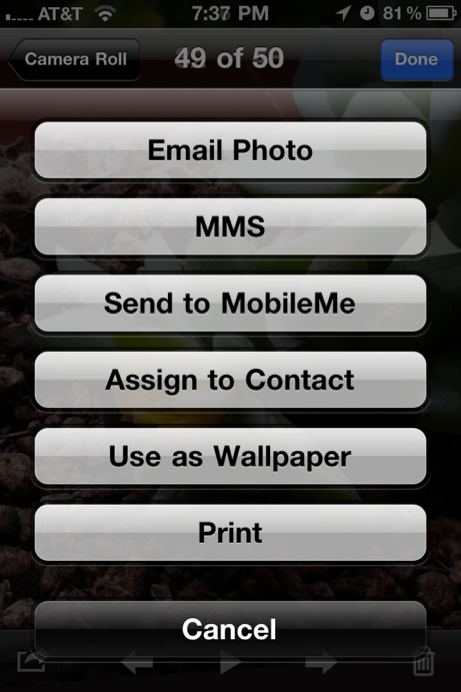
Turns out that little curvy arrow flying out of a rectangle has a name— the Sharing button– and it turns out that it’s not exclusive to the Photos app. It shows up other places too. I will show you one more place, and you will keep your eye out for more. First, let’s talk about the various options hiding behind the Sharing button in the Photos app.
You’ve been using the Email Photo option, but the others may be new to you (they also might not all be there for you– some of these options showed up in iOS 4, and I haven’t had time to upgrade your iPhone from iOS 3. Something to look forward to.)
Email Photo: does what it sounds like. Address the email and give it a subject, write a little if you want, and send it. Note: the iPhone may ask you whether you want to send a small, medium, or large version of the picture– if it does, you have to make a choice. Until you do the email does not get sent.
MMS: this sends the picture as a “text message.” We just learned to “text” and you know how cool that can be– now, you can “text” a picture to someone. If they have an iPhone it will show up on their iPhone without them going to “check email” or anything (just like a text message always does). The pictures you send this way are smaller than the ones you email, unless you choose “small” as the email option.
Send to MobileMe: you don’t have a MobileMe account so this one is not going to do much for you. Even if you did have a MobileMe account you wouldn’t have one for long, as the “iCloud” service will unfortunately not include this feature when it comes into being and MobileMe goes away. But, in the interest of completeness, I will tell you that the idea with Send to MobileMe is you can “publish” photos to the internet, storing them on Apple’s special MobileMe servers, where other people can come to see them without you having to email the pictures (for an example, click here). It is really neat, and it’s a drag that Apple has decided to pull the plug on it. The iCloud will have something similar, but not the same, and of course the button will have to get a new name too– I am betting on “Send to iCloud” or something like that. We can talk about this again in a few months when iCloud is up and running.
Assign to Contact: this a great one. You will use it all the time. When you tap “Assign to Contact” you’re shown all of the people in your Contacts list. Scroll around and find the person you want to assign the picture to. You might think that’s it, but it’s not! You then get to resize and move the picture, so if it’s a picture of three people you can use it three times (once for each person) by scaling and moving the picture to show each person in turn. The picture will pop up on your iPhone’s screen when the person calls. It will also show up in a tiny version on each email you get from that person. It’s very cool.
Use as Wallpaper: sort of nice. “Wallpaper” means different things depending on which version of the iOS software you’re using. On iOS 3 (which is what your iPhone uses) “wallpaper” means the picture that you see when you wake up the iPhone (also known as “the lock screen” because it is showing when you “unlock” the iPhone with that little swipe from left to right). One iOS 4, “wallpaper” still refers to the “unlock screen”, but it also refers to the background behind the app icons. In iOS 4, you get to make the choice, and you can assign the picture to the lock screen, to the picture behind the icons, or both. Personally, I like the background to be black, so I would never change that, even though I know how. Just because you can doesn’t mean you should. But change that “lock screen” image as often as you like.
Print: I will give you ONE guess as to what this button would do. Obviously, it’s supposed to print the picture, but it doesn’t work on YOUR iPhone because your iPhone is on iOS 3 and the Print feature didn’t exist until iOS 4. Don’t feel bad about missing out on printing though. The feature works with only a few printers (a very select few from HP, and no others), and you can always just email the picture to yourself and print it from your iMac. (Note: if you were on iOS 4, and you didn’t have an HP printer, and you still wanted to print from your iPhone to your printer, I would set you up with Printopia. For $20 it makes this so-called “AirPrint” feature work with practically any printer.)
Whew. There’s more behind the “Share” button in the Photos app than I remembered.
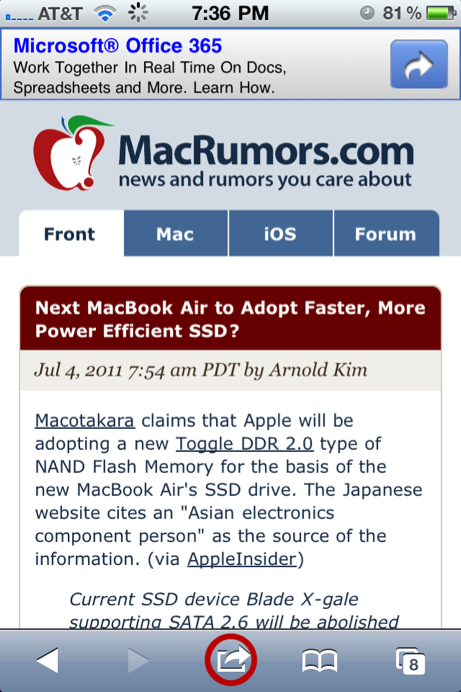
I told you a LONG time ago (in this blog entry) that I’d tell you about one more place where the Sharing button works. The “one more place” is the Safari app. Anytime you’re looking at a web page on your iPhone you’ll see a row of buttons across the bottom. See below. I’ve circled the button in red. Note: on iOS 3, the Sharing button is simply a “+”. They fixed that in iOS 4. Whether a + or a Sharing button, it works the same. This time, being on iOS 3 is just as good as being on iOS 4.

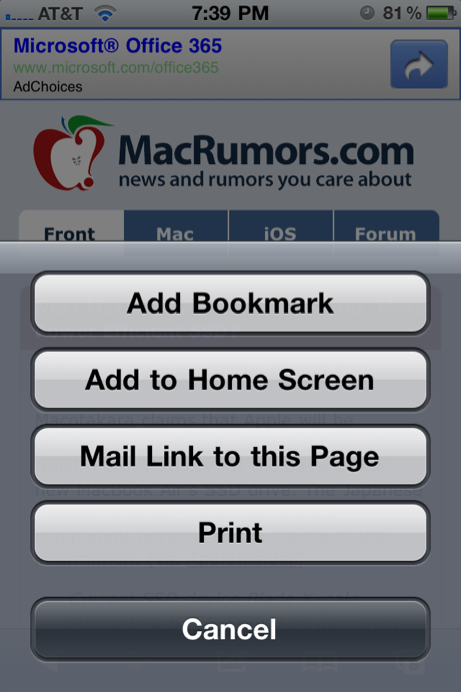
You get some options when you tap the Sharing button in the Safari app, and here they are:

Add Bookmark: it does what you think it does, for whatever web page you’re on. And, since your iPhone is synching with your iMac, a bookmark you make on the iPhone will show up on your iMac as soon as the two devices sync. This is very handy.
Add to Home Screen: puts an icon on your Home Screen. The icon is essentially a bookmark (to the web page you’re one), with a nice icon. Touching the icon takes you straight to the web page. It’s super-handy. Try this one right away– I am sure that you will use it all the time.
Mail Link to this Page: by far the easiest way to tell someone about the web page you’re on. It’s just like emailing a photo, except here you’re sending a link to a web page.
Print: not for you, not yet. Same problems as above– only works in iOS 4, and then only just barely, unless you get the excellent Printopia for twenty buckos. We will cross that bridge later.
If I had to pick my favorite “Sharing” items, I’d pick “Email Photo” and “Mail Link to this Page.” I use those constantly. The other Sharing items are interesting too, though, so give them a chance and see what you think.
That’s nine.
Copyright 2008-2024 Christian Boyce. All rights reserved.
Did this article help you?
Maybe you'd like to contribute to theChristian Boyce coffee fund.

Want some some quick iPhone how-tos?
Visit me at iPhoneinaminute.com.
Looking for quick tips about Macs?
See my One-Minute Macman website!
Please Leave a Comment