Updated January 7th, 2017.
I get a lot of complaints about Yosemite’s Spotlight search. Generally the complaints are “Spotlight finds everything except what I’m looking for!” Actually, what often happens is Spotlight does find what you’re looking for, but it finds so many other things that the thing you’re looking for gets lost in the soup.
For example, here I’m looking for my Christmas shopping list. I bring up Spotlight and type in “Christmas” and I get this:
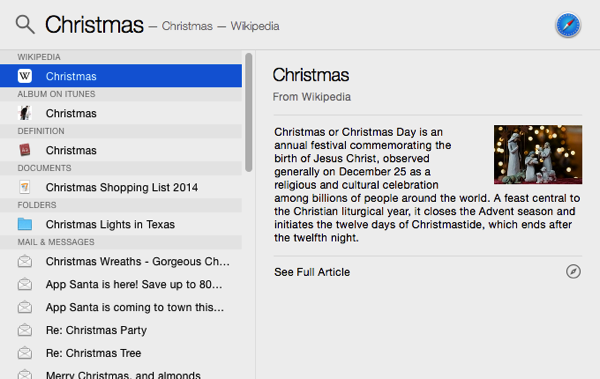
Yes, the shopping list is in there, but geez, I wasn’t looking for a Wikipedia definition, or Christmas music, or a dictionary definition. I know it’s cool that Spotlight can find all that stuff but just because it’s cool doesn’t mean I want it.
Here’s how you can fine-tune Spotlight so it finds only the stuff you want.
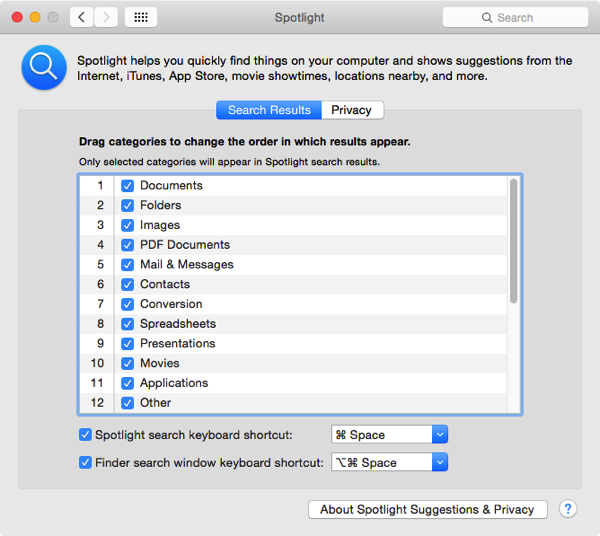
Go to System Preferences (under the Apple menu) and click on Spotlight (top row).
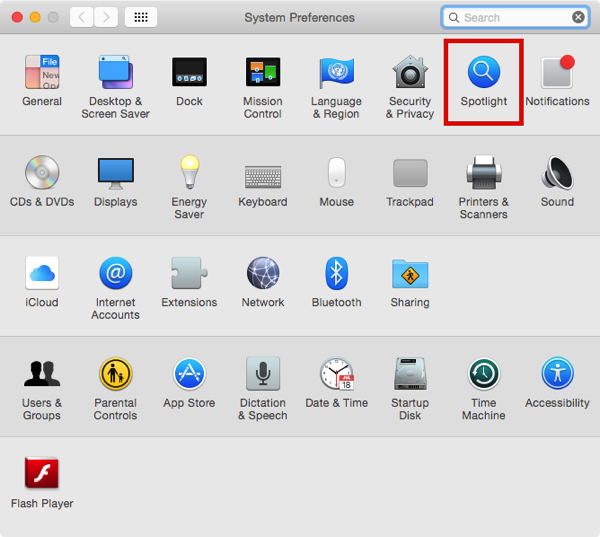
Look at all those places that Spotlight searches!
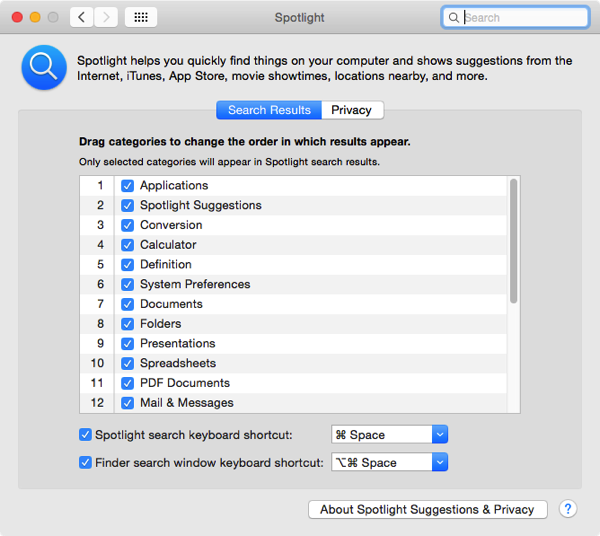
and also…
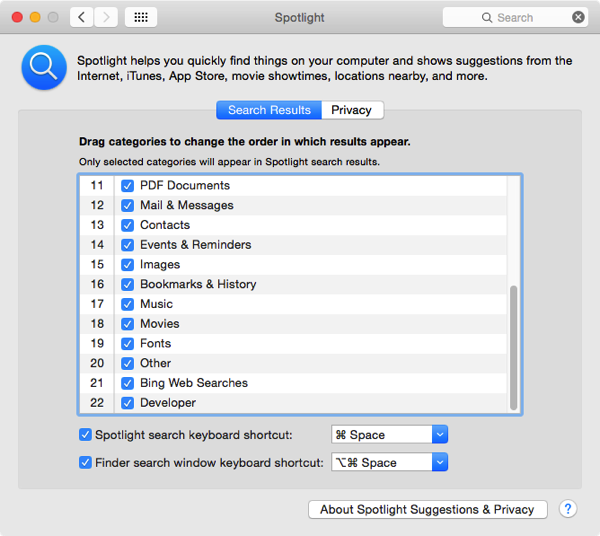
The more places Spotlight searches, the more it finds. It might be a good idea to uncheck some of those boxes so your Spotlight results don’t include things you’re not interested in searching for (example: “Fonts”).
Item #21 (“Bing Web Searches”) is new, introduced in Mac OS Yosemite, and that one deserves extra attention. Click the button “About Spotlight Suggestions & Privacy” and read all about it as you may not feel comfy knowing Microsoft is doing the web searches (Bing is a Microsoft thing). Apple says they told Microsoft not to track you, but these days, who (besides North Korea) really knows?
You also may want to re-order the categories, so the stuff you want is at the top of Spotlight’s search results. Just drag the categories up or down, to suit your preferences. Here’s how I did it (you can’t tell by the picture, but on my Mac, everything else– that is, items 13 through 22– are unchecked):
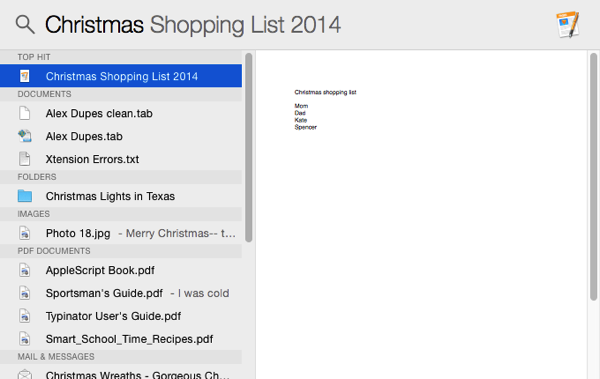
Now that I’ve made these adjustments to Spotlight’s preferences, when I search for “Christmas” I get a simpler list– more documents, no Wikipedia, no music, etc. In fact, the thing I was looking for is at the very top of the list. How about that. See below.
Now you know how to adjust Spotlight’s settings, and if I ended right here you would have gotten your money’s worth. Even so, I have a handful of bonus tips for you.
Bonus Tip #1
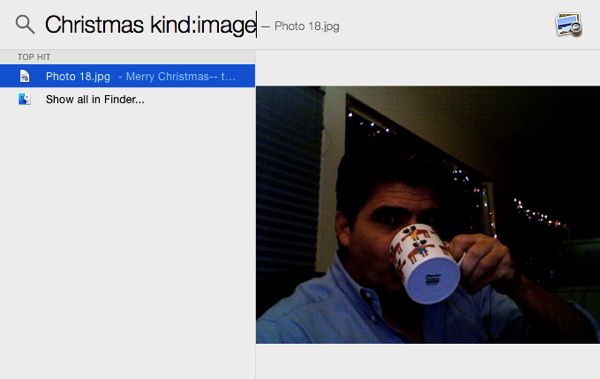
If you’re looking for a particular kind of thing, let’s say an image, you can restrict the results of a Spotlight search by typing “kind:image” after your search term. See below.
(For other ways you can restrict a Spotlight search, see this article on Apple’s site.)
Bonus Tip #2
You can use Spotlight to search your address book. This is very handy, as it saves you from opening the Contacts app first. In fact, it saves you from opening the Contacts app at all, as Spotlight shows you the contact information right in the Spotlight window. It’s super-easy and super-fast, and you don’t even need to type the person’s whole name. The way I do it: type the first initial, then a space, then part of the last name. For example, if I’m looking for Joe Smith, I type “j smith.” You can do it the other way around (“joe s”) or even do part of the first name and part of the last, like so: “jo sm.” (Don’t type the quotes.)
Bonus Tip #3
Spotlight is very fast, but accessing Spotlight by clicking the magnifying glass at the top right of the screen takes some mousing-around time. Speed things up by using the keyboard shortcut shown in Spotlight’s preference pane. The shortcut is Command-spacebar by default, as seen in some of the screenshots in this article. Try it once and you’ll be hooked.
Bonus Tip #4
Sometimes Spotlight fails to find a file that I know is on my Mac. In cases like that I turn to a free app called EasyFind. It’s not as fancy as Spotlight, and it’s not as fast, but it’s easy to use and it will find your file. It also has an awesome icon.
Bonus Tip #5
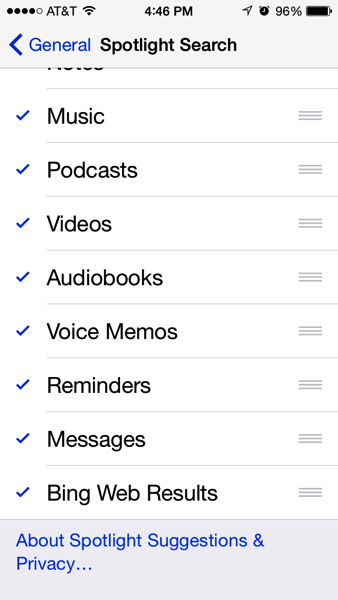
Spotlight on your iPhone has settings too. You ought to have a look at your iPhone’s settings now, while you’re thinking about it. That goes for your iPad too. Go to Settings/General/Spotlight.
Did this article help you?
Maybe you'd like to contribute to theChristian Boyce coffee fund.

Want some some quick iPhone how-tos?
Visit me at iPhoneinaminute.com.
Looking for quick tips about Macs?
See my One-Minute Macman website!

Please Leave a Comment