Updated December 19th, 2015.
Apple’s packed some great photo-editing features into iOS 8’s Photos app. It’s not quite Photoshop but it may be all you need. Plus, it’s already on your iPhone, assuming you’re on iOS 8. Plus it’s a ton of fun.
Here’s how you can use these features to quickly improve your pictures.
Mom, and others on iOS 7: use Snapseed. Sorry about that.
Start by taking a picture, or choose one from your Photo library, and tap “Edit” at top right. If all you see is a picture, tap the picture itself and you’ll see buttons appear at top and bottom. You want the one at the top right.
Here’s a nice picture of a Bird of Paradise plant. It looked better when I took it. I’m going to fix it up.

After you tap Edit you’ll see something like this. Actually, exactly like this. Except your picture won’t look like mine.

The first thing to try is the Magic Wand, in the top right corner. All you do is tap it and like magic your picture gets better. Tap it again to turn it off in case you don’t like the results. You can see that it’s fixed up my picture a little bit. I don’t know all of what it does but that’s why they call it magic.

I’m going to turn the Magic Wand’s effect off, because while it fixed things up a little bit it didn’t fix it up enough.
Let’s look at the options across the bottom of the screen: Cropping, Filters, and Adjustments.
Cropping works as you might expect: tap the Crop tool and drag things around until the picture is nicely cropped.
Note you can rotate the picture as well, either freehand (by dragging with your finger) or in 90-degree steps using the square-with-curvy arrow button at bottom left in this picture.
I’m going to crop out the car in the background, at least part-way. You can also tap inside the frame and drag your picture around, as I have here. The iPhone will wait a second or two for you to stop moving things, and then it will crop and zoom in on the part of the photo you’ve kept.
Here’s how it looked while I was working on it…

And here’s how it looked a few seconds later, when the cropped section zoomed to fill the screen.

The picture is better already.
By The Way: if you want to crop to a particular aspect ratio– maybe a square, or 16:9– tap the white button above the “Done” button at lower right in my picture. That will give you all of the standard aspect ratios you’d ever want. I, of course, wanted to do it “my way” so I did not use that button (although I did come pretty close to making a square).
You might be tempted to tap “Done” at this point but that would not be the right move here. If you do that you’ll save the picture, which is fine, but we have more editing to do.
You might also be tempted to use the Filters (the middle button across the bottom). I wasn’t. But, since all you do in the Filters section is look at a bunch of thumbnail variations and pick the one you want, you don’t need my help with that.
Let’s get to the good stuff. It’s all under the Adjustments button. Tap it and you’ll get something like this:

You can do a lot here– I’m going to start in the middle, with color, because I want to punch things up by over-saturating the picture.
If you tap on “Color” (or anywhere in that row that isn’t the down-arrow at the far right) you get this:

You can drag back and forth until you get a picture that you like, and there’s nothing wrong with that. But it’s a little coarse and rather limited. The better way to go is to tap the down-arrow to begin with (or, if you accidentally got into the coarse-and-limited area, tap the icon I’m pointing to with the red arrow).
This is what you’re looking for: options galore.

I want to adjust “Saturation” so I give that a tap, leading to this:

This is typical of the way you make adjustments: you get a slider, and you drag it around until you’re happy. It took dragging all the way to the right before I was happy and here’s how it looked:

No wonder I was happy. What a great picture, all of a sudden. However, after mulling it over I decided to back off just a little. It’s still great, just a little less loud about it.

Now we’re getting somewhere. Contrast is controlled the same way that Saturation is– with a slider. You get to Contrast by tapping the icon that looks like this:

Because it’s so easy, and because this picture doesn’t need any help in the Contrast department, I’m skipping it. But I will show you “Cast.”
This is really “Color Cast” and it controls whether your picture is “warm” or “cool.” Here’s full-blast “warm:”
 (picture with full-blast warm color cast)
… and here’s full-blast “cool.”

I like it almost full-blast warm, as it reminds me that the sun was going down and everything had a nice warmth to it.

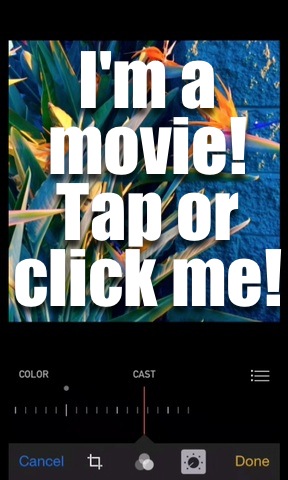
Down below’s a little movie showing you how I got to this stage. (You probably have to tap the movie to start it.)
Now let’s see what we can do using the controls under “Light.” Remember, if you tap where it says “Light” you get the slider with the thumbnails. (Also remember: tap that button with the three dots and the three lines to get to where you can choose the Light section). If you want finer control tap the down-arrow.
Here’s what the basics looks like…

and here are the finer controls.

I’m going to darken up the shadows a little because I want the plant to really “pop.”

One more thing I want to adjust is the so-called “Black Point.” What you’re doing with Black Point adjustments is saying “See this shade of gray? Everything that’s darker than that, make it pure black.” With the Photos app you don’t actually get to point to the shade of gray you’re talking about. Instead, you use (what else?) a slider.
Here’s how it looked after a little Black Point adjusting.

I’m going to skip the Black and White section because I’m pretty sure, after having seen how Light and Color work, that you don’t need me to show you. Besides, I want a color picture, not a black and white one.
BONUS TIP THAT I DISCOVERED WHILE WRITING THIS BLOG POST:
Suppose your screen looks like this:

Swipe down on the main photo– you see the color thumbnails! Drag some more and you see the Light adjustments, and eventually the Light thumbnails. That’s a nice way to switch between things, isn’t it? You can drag on the thumbnails too but it is hard to drag exactly straight up and down when you get into the adjustments sections. Try it and see.
Here are the Color thumbnails…

and here are the Light thumbnails, both accessed by swiping up and down on the main picture.

Watch the movie below and see. (You probably have to tap the movie to start it.)

Now suppose you make a mistake and accidentally change your picture to black and white. Can you get out of that? (Of course you can– this is a set-up.)

Naturally you could tap “Cancel” but that cancels EVERYTHING. You don’t want to start over. But notice the B&W is now black writing on white– before we made our mistake, it was the other way around. Tap it, and it reverts. What a relief! See below, and notice how the “B&W” label changes. .

Once we’re satisfied with things we tap “Done” and the picture is saved. Here’s our final product. Compared to the original, there’s no comparison. The adjusted version is a LOT better. Maybe I should have stopped after the Saturation step, come to think of it. But it’s still better.
Final Product (below)

Original Photo (below)

Turns out there’s more to learn but this is enough for today. If you’re wondering about the button we didn’t tap– the one opposite the Magic Wand– that’s the button that allows you to access other photo-editing apps, without leaving the Photos app itself! That’s pretty neat, but it’s also very new, and not too many programs make themselves available to the Photos app that way. If you have some photo-editing apps on your iPhone or iPad you ought to give that button a tap.
Copyright 2008-2023 Christian Boyce. All rights reserved.Did this article help you?
Maybe you'd like to contribute to theChristian Boyce coffee fund.

Want some some quick iPhone how-tos?
Visit me at iPhoneinaminute.com.
Looking for quick tips about Macs?
See my One-Minute Macman website!

Please Leave a Comment