Updated July 4th, 2016.
Secrets of the Mac OS Dock
We use the Dock all the time without thinking much about it. But, it turns out there are a lot of “Dock things” worth thinking about. The more you know the better you can use it. That goes for me too: while writing this article I learned some stuff myself.
Here are some “Dock things” I think you should know.
1. Move it around.
The Dock can be placed at the left edge of the screen, the right edge of the screen, or the bottom of the screen.
You can go to System Preferences/Dock and position the Dock at left, bottom, or right, but it’s more fun to do it by holding down the Shift key, clicking and holding on the little line (see picture), and dragging it to different locations on the screen. Yay.
![]()
![]()
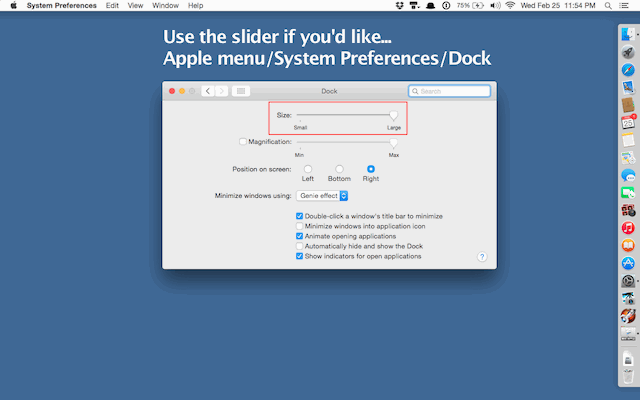
2. Make it as big as you can.
Why squint at tiny icons when you can put off getting glasses by making the icons bigger? The Dock will make the icons as big as it can (or, as small as necessary), depending on how you adjust the Size in the Dock Preferences. Suggestion: make it “Large.” Bonus: drag the little line– same one as in the previous tip– to resize the Dock. No need to go to System Preferences/Dock (although you can do it that way if you want to). When the Dock’s at the bottom, drag the line left or right. When the Dock’s positioned at the left or right side, you still drag the little line left or right. Sort of weird but it works.
3. Click and hold.
Oh, the things you’ll discover if you click and hold on an icon in the Dock! Firstly, if you click and hold on the icon for an app that’s running, you’ll produce a little menu with “Quit” at the bottom.
This is a nice way to quit things. If you have trouble quitting something (maybe the app has crashed) try holding the Option key. “Quit” becomes “Force Quit” and it will really pull the plug on the app. Do this only when you have to as it is rough on the app. (You may have to choose “Force Quit” twice if a program is really stuck.)
There’s other great stuff in those menus. Slide to Options, then notice “Keep in Dock” (perfect for that app that is in the Dock sometimes, but disappears other times), “Open at Login” (which means the app will launch every time you turn on your Mac), and my favorite, “Show in Finder,” very handy when you wonder where the real thing is (because the icons in the Dock are just remote-control triggers to the real things).

4. Drag documents onto icons already in the Dock.
Why would you want to do that? Because when you do, the icon you’re dropping onto is the app that will open your document. For example, let’s say you have a PDF and it opens with that abomination “Adobe Reader” when you double-click. You’d rather open it with Apple’s Preview. If Preview is in the Dock you can open your PDF in Preview by dragging the PDF to the Preview icon in the Dock and letting go.Want to get fancier? Drag a file (picture, Word document, even a folder) onto the Mail icon in the Dock. That creates a new Mail message with your file(s) as the attachment(s).
The ultimate: drag things from Safari’s Downloads menu straight to icons in the Dock, such as Mail or Preview.
5. Take a moment to have some fun.
When you click the yellow button in a window’s top left corner the window minimizes itself into an icon in the Dock. If you hold the Control key down while you do it, the minimizing action is slightly slower. If you hold the Shift key down while you do it, the minimizing action is a LOT slower. And if you hold the Control key and the Shift key while clicking the yellow button, the minimizing action is incredibly slow. Impress your friend with your slow-motion Mac mastery!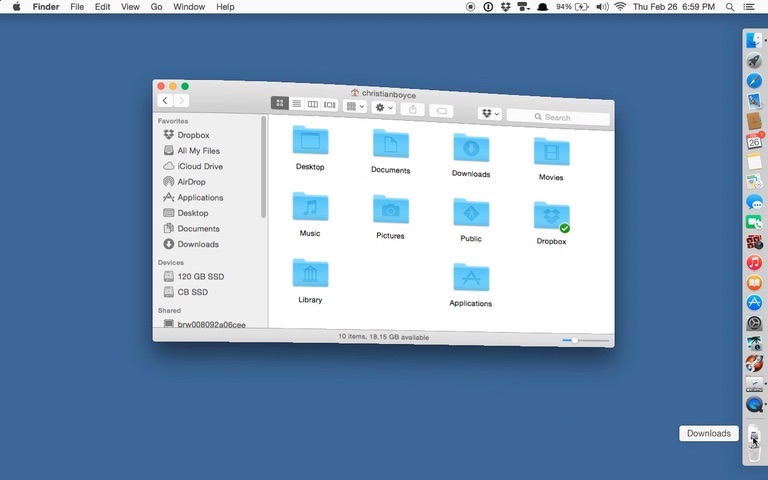
Click and hold (again)– this time, on a running app.
Some apps give you a menu with special options when you click and hold on their icons in the Dock. For example, Safari will show you every open window if you so choose. Here’s how the menu looks…
and here’s what happens if you choose “Show All Windows.”

Click on the window you want to look at and away you go. Rather handy.
6. Turn off Magnification
Magnification is the feature that makes the Dock icons bulge when you pass the mouse over them. Looks like this:
It’s nice to look at, but squirming icons are harder to click. You can turn off the squirming in the Dock’s preference pane. I’d do it right away.
Super-Bonus tip that no one knows: if you’ve turned off magnification, but for some reason you want to turn it on again temporarily, hold down the Control and Shift keys while you move the mouse over the Dock. Presto: magnification is back on, but only as long as you keep the keys down. Wild.
One more thing: the Dock responds to single clicks. You don’t have to (and shouldn’t) click twice.
That’s it. I hope you enjoyed it. Feel free to tell a friend– that’s a big compliment and I would appreciate it very much.
Copyright 2008-2023 Christian Boyce. All rights reserved.
Did this article help you?
Maybe you'd like to contribute to theChristian Boyce coffee fund.

Want some some quick iPhone how-tos?
Visit me at iPhoneinaminute.com.
Looking for quick tips about Macs?
See my One-Minute Macman website!

Please Leave a Comment